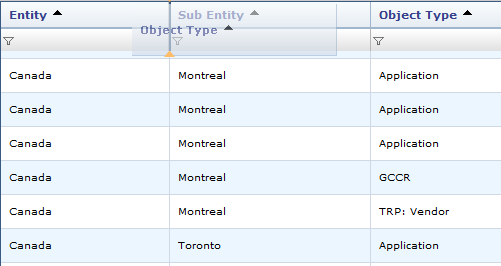
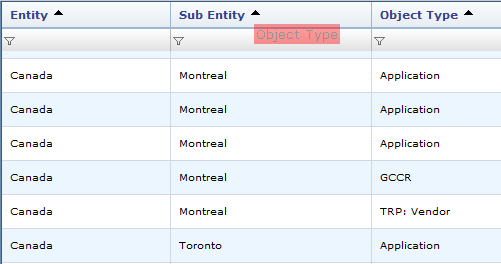
Infragistics Aikido WebDataGrid offers a nice built-in ColumnMoving behavior. When enabled – it allows user to drag columns to change their order:

But what if you want to keep this behavior and add your own custom column drag-and-drop? For example to create your own column grouping, since WebHierarchicalDataGrid doesn’t handle grouping well.
In this post I will describe a simple technique how to both keep behavior shown above and implement custom column drag-and-drop:

The idea is to use custom drag anchor inside of column header. I am using actual header caption text, so when column is dragged by the text – custom drag-and-drop kicks in. If column is dragged by empty space around the caption – build-in ColumnMoving behavior takes over. You can use other element for drag anchor, for example an icon next to caption text.
In my case since caption is a plain text and drag source need to be an HTML element, text needs to enclosed into HTML tags. In keeping with traditions of good old UltraWebGrid, I am using <NOBR> tags. If you know in advance what columns your grid will display you can modify columns caption directly in grid layout. In my scenario grid displays results of dynamic query and I don’t know in advance how many columns will be retrieved, so I am building grid column collection in code behind – and this is where I add <NOBR> tags to column headers:
    ''' <summary>
    ''' Creates WebDataGrid columns based on Data Source
    ''' </summary>
    ''' <param name="i_xWdg">WebDataGrid to create columns in</param>
    Sub InitGridColumns(ByVal i_xWdg As GridControls.WebDataGrid)
        Dim dtTable As DataTable = Session("Data")
        Dim oGridCol As GridControls.BoundDataField
        Dim sColName As String

        i_xWdg.Columns.Clear()

        For I As Integer = 0 To dtTable.Columns.Count - 1
            sColName = dtTable.Columns(I).ColumnName

            oGridCol = New GridControls.BoundDataField()
            oGridCol.DataFieldName = sColName
            oGridCol.Key = sColName
            oGridCol.Header.Text = "<nobr>" & sColName & "</nobr>"
            i_xWdg.Columns.Add(oGridCol)
        Next
    End Sub
This code is a good replacement for grid’s built-in “AutoGenerateColumns” property. When the property is set to “true” columns are also generated based on datasource, but server-side column collection is not created, so if you need some customization, for example hide some columns, adjust column captions or formats – you’re out of luck. But the code above can do that. It can be called anywhere after data has been retrieved but before it is bound to the grid. In this example it’s an ADO.NET DataTable stored in a Session variable, but it can be pretty much any source that WebDataGrid can bind to.
Now we need to setup drag-and-drop on the client. By the way, you know those scripts you need to add to your script manager to enable drag-and-drop behavior: igDragDrop.js, 5_igObjects.js, igAnimation.js?

Well if your ASPX page has a WebDataGrid with ColumnMoving behavior enabled – you don’t need to add them – the grid is already loading drag-and-drop library for you.
First we need to initialize drag-and-drop behavior object along with it’s properties. Best way to do it in app_load event:
Sys.Application.add_load(appLoaded);

var dd;

function appLoaded() {

    // Initializing drag-n-drop behavior
    if (!dd) {
        dd = new $IG.DragDropBehavior()
        dd.addTargetElement($get("xdivTarget"), true);
     }

    initGridDragDrop()
}
This is very basic setup, drag-and-drop behavior object is created and target is added (element should exist in your HTML markup). You can add event handlers, markups etc. at this stage. Note initGridDragDrop function – this is where grid columns are added as drag sources. And here it is:
function initGridDragDrop() {

    // reference to the grid
    oGrid = $find('xMyGrid'); if (!oGrid) return;

    // refefrence to grid columns
    var aGridCols = oGrid.get_columns(); if (!aGridCols) return;
    var iColCount = aGridCols.get_length(); if (iColCount == 0) return;
    var oCol;

     // looping thru grid columns, adding them as drag source
    for (var I = 0; I < iColCount; I++) {
        oCol = aGridCols.get_column(I);
        dd.addSourceElement(oCol.get_headerElement().firstChild)
    }

}
The code retrieves reference to the grid object and after series of checks loops thru client-side column collection, adding header’s caption (encosed in <NOBR> element) as a drag source.
One caveat: When grid performs async postback (this can happen when you page, filter, sort etc.) columns no longer act as custom drag sources, so we need to re-add them. We can do it by handling grid’s client-side AJAXResponse event and calling initGridDragDrop again:
function xmyGrid_AJAXResponse(sender, eventArgs) {
    initGridDragDrop()
}
That’s pretty much it. When grid is displayed, you drag columns to your target element by column caption and still move the columns to change their order by dragging by empty space outside of caption.
