I’ve written before about EffectLayer library for Pebble smartwatch I’ve been working on. The idea is – user places the layer over screen and that layer applies an effect to screen content.
I’ve started with a few basic effects (invert, mirror) but since then several more developers joined the project adding more cool features. Ron added 90° rotation, zoom and lens effect. Gregoire Sage added cool blur effect. LeFauve not only added FPS effect, but also optimized the library to run the effects in a very efficient way: now effect can be defined as a function (even user defined function!) and that function passed as a parameter to effect_layer_add_effect method along with parameters for that effect.
I, for my part, contributed “mask” effect. What it does is essentially lets you show parts of background image thru user defined mask, creating a feel of transparency.


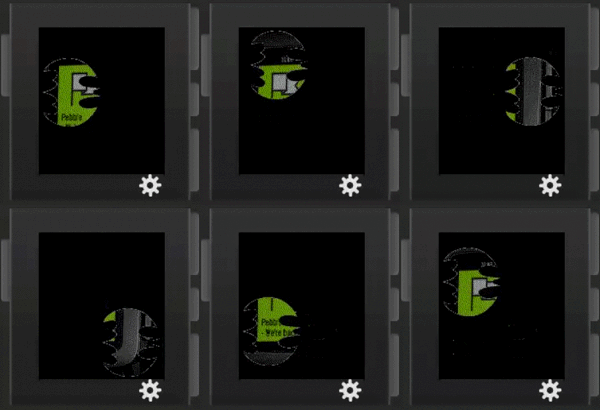
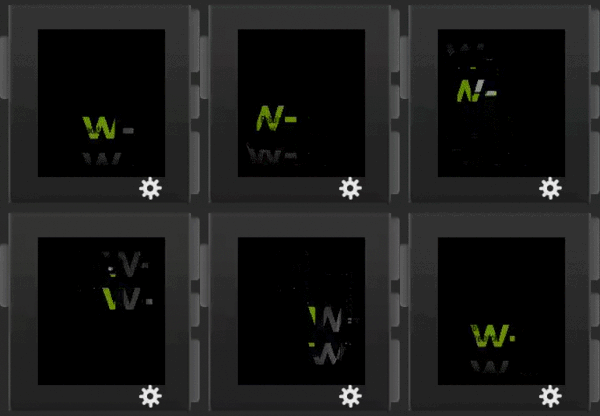
Effect works in two modes: full mode, where user supplies mask color, background color, mask image (or, if masking by text, text, its font and alignment), and background image. Full mode effect is demonstrated by these images (text mask and bitmap mask respectfully). And it works on classic “Aplite” Pebble too.
 Second mode is onscreen: user supplies just mask color and background image and specifies background color as GColorClear. In this mode EffectLayer uses whatever is already drawn on the screen in mask color as the mask to show background image through. Onscreen mode effect is demonstrated by this image (which is actually watchface “Simple Striped” published to Pebble appstore) It also works both on classic Pebble and Pebble Time.
The way Mask effect behaves is determined by parameter passed to the effect_mask function. And here is how type of parameter is defined:
typedef struct {
  GBitmap*  bitmap_mask; // bitmap used for mask (when masking by bitmap)
  GBitmap*  bitmap_background; // bitmap to show thru mask
  GColor    mask_color; //color of the mask
  GColor    background_color; // color of the background
  char*     text; // text used for mask (when when masking by text)
  GFont     font; // font used for text mask;
  GTextOverflowMode text_overflow; // overflow used for text mask;
  GTextAlignment  text_align; // alignment used for text masks
} EffectMask;
Knowing this structure, if you want to define full mode effect, you can specify properties something like this:
static EffectMask mask;

mask.text = NULL;
mask.bitmap_mask = gbitmap_create_with_resource(RESOURCE_ID_MASK);
mask.mask_color = GColorWhite;
mask.background_color = GColorBlack;
mask.bitmap_background = gbitmap_create_with_resource(RESOURCE_ID_BACKGROUND);
In this example we’re using bitmap mask (so we’re specifying NULL for text and creating mask bitmap from recourse). Mask image should be of white color (which we also specify via mask.mask_color property). We also specify color of the background and bitmap for background. With this parameter defined EffectLayer will be drawn in black color and will show background image thru shape defined by mask bitmap. Text mask works in similar matter, only instead of specifying bitmap mask, you set it to NULL and define text string, font and alignment instead.
To define onscreen mode effect parameter will look like this
mask.text = NULL;
mask.bitmap_mask = NULL;
mask.mask_color = GColorWhite;
mask.background_color = GColorClear;
mask.bitmap_background = gbitmap_create_with_resource(RESOURCE_ID_BACKGROUND);
As you can see here we define neither text bitmap nor background bitmap, and specify transparent color for layer background. In this mode, whatever is already drawn on the screen in mask color (white in this case) will act as a mask for background image your supplied.
Once the parameter defined to add mask effect to your screen is pretty straightforward:
EffectLayer* effect_layer;

effect_layer = effect_layer_create(GRect(0,0,144,168));
effect_layer_add_effect(effect_layer, effect_mask, &mask);
layer_add_child(window_get_root_layer(window), effect_layer_get_layer(effect_layer));
Here we create EffectLayer (making it take full screen 144×168), adding mask effect with defined mask parameter and adding the layer to main window.
If you want to pick under the hood how effect_mask works, you’re in luck, here it is:
void effect_mask(GContext* ctx, GRect position, void* param) {
  GColor temp_pixel;
  EffectMask *mask = (EffectMask *)param;

  //drawing background
  if (!GColorEq(mask->background_color, GColorClear)) {
    graphics_context_set_fill_color(ctx, mask->background_color);
    graphics_context_set_text_color(ctx, mask->mask_color);
    graphics_fill_rect(ctx, GRect(0, 0, position.size.w, position.size.h), 0, GCornerNone);
  }

  if (mask->text) {//if text mask is used - drawing text
     graphics_draw_text(ctx, mask->text, mask->font, GRect(0, 0, position.size.w, position.size.h), mask->text_overflow, mask->text_align, NULL);
  } else if (mask->bitmap_mask) { // othersise - bitmap mask is used
     graphics_draw_bitmap_in_rect(ctx, mask->bitmap_mask, GRect(0, 0, position.size.w, position.size.h));
  }

  //capturing framebuffer bitmap
  GBitmap *fb = graphics_capture_frame_buffer(ctx);
  uint8_t *bitmap_data =  gbitmap_get_data(fb);
  int bytes_per_row = gbitmap_get_bytes_per_row(fb);

  //capturing background bitmap
  uint8_t *bg_bitmap_data =  gbitmap_get_data(mask->bitmap_background);
  int bg_bytes_per_row = gbitmap_get_bytes_per_row(mask->bitmap_background);

  //looping thru layer replacing mask with bg bitmap
  for (int y = 0; y < position.size.h; y++)
     for (int x = 0; x < position.size.w; x++) {
       temp_pixel = (GColor)get_pixel(bitmap_data, bytes_per_row, y + position.origin.y, x + position.origin.x);
       if (GColorEq(temp_pixel, mask->mask_color))
         set_pixel(bitmap_data, bytes_per_row, y + position.origin.y, x + position.origin.x, get_pixel(bg_bitmap_data, bg_bytes_per_row, y + position.origin.y, x + position.origin.x));
  }

  graphics_release_frame_buffer(ctx, fb);

}
In the function first we retrieve passed mask parameter in Line 03, then in Lines 06-10 check, if background color is passed and if it is – fill layer with this color (and set text color, in case we use text mask). Lines 12-16 check what kind of mask is used: for text one it draws text, for bitmap – draws bitmap. And if neither is passed – no mask is drawn. Lines 19-25 capture both screen image and background bitmap supplied by users as raw data and finally Lines 27-33 loop thru layer coordinates replacing pixels of mask color with pixels from background bitmap.
Don’t forget to destroy the bitmaps you created in your code cleanup section (window_unload, deinit etc.)
UPDATE AUG-21-2015 <– As of this version Mask Effect can use multicolor array for mask. So above's mask.mask_color becomes mask_mask_colors. Example usage assignment:
#ifdef PBL_COLOR
   mask.mask_colors = malloc(sizeof(GColor)*4);
   mask.mask_colors[0] = GColorWhite;
   mask.mask_colors[1] = GColorBlue;
   mask.mask_colors[2] = GColorRed;
   mask.mask_colors[3] = GColorClear;
#else
   mask.mask_colors = malloc(sizeof(GColor)*2);
   mask.mask_colors[0] = GColorWhite;
   mask.mask_colors[1] = GColorClear;
#endif
Here you allocate size of your array (plus one element, because array always have to terminate with GColorClear as last element) and assign colors. And don’t forget to free what you malloc’ed at the end.
Useful links
- Source code of EffectsLayer library
- Source code of “Simple Stripe” watchface that shows usage of the library

Thanks for making this awesome library! It makes my life a lot easier 🙂
@Kristof thanks for using it 🙂 It’s really fun to make it, hopefully we will have proper documentation soon.