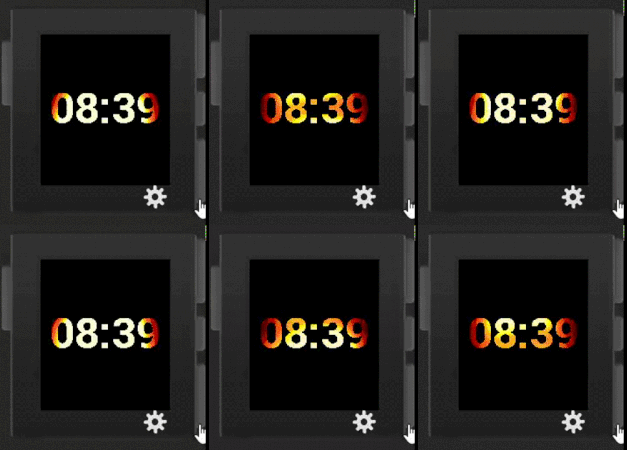
 Pebble SDK has had a feature allowing to combine 2 images with transparency for a while via different composition modes. Unfortunately this doesn’t apply to texts, so, for example, if you need to display transparent time over bitmap background – you had to draw time digits as custom bitmaps. What’s worse – composition modes do not apply to colors, the result is always black-and white.
But there is a way. Pebble allows you to capture graphics context of a layer as a standard bitmap in the layer update callback. You can access that bitmap as raw data. So if you have another bitmap with the background you want to show through current layer, all you have to do is copy it byte by byte into captured bitmap, but only if pixel of specified color, that you use as a mask is encountered.
For example if your current layer needs to show background bitmap “s_bitmap” thru whatever is drawn in white color (255) you can use following snippet:
GBitmap *fb = graphics_capture_frame_buffer_format(ctx, GBitmapFormat8Bit);

uint8_t *fb_data =  gbitmap_get_data(fb);
uint8_t *background_data =  gbitmap_get_data(s_bitmap);

for (int i=0; i < 144*168; i++) {
  if (fb_data[i] == 255) {
    fb_data[i] = background_data[i];
  }
}

graphics_release_frame_buffer(ctx, fb);
Here Line 1 captures context as a bitmap, Lines 3-4 access captured bitmap and background bitmap as raw data. Lines 6-10 loop thru the captured data (each pixel takes a byte and in this example we’re going thru full 144×168 screen). If pixel of a white color is encountered – it is replaced with pixel from the same address of the background bitmap. And finally Line 12 releases captured framebuffer.
And if you combine this approach with APNG support that Pebble Time features, you can even create animated texture for your texts.
UPDATE: Thanks to @Jnm for this tip: If your masking layer is black-and white (00 & FF) that entire IF block can be replaced with bitwise AND:
fb_data[i] &= background_data[i];
And effect will be the same.
UPDATE 2 You can further optimize this code in 2 ways: First, let’s say your mask begins at Y = 50 and ends at Y = 100 – you don’t have to loop thru entire screen – you can use the loop below. It also demonstrates how you can jump 8 pixels/bytes at a time by utilizing 64-bit type:
uint64_t *fb_data = (uint64_t *)gbitmap_get_data(fb);
uint64_t *background_data = (uint64_t *)gbitmap_get_data(s_bitmap);

for (int i=50*144/8; i < 100*144/8; i++) {
  fb_data[i] &= background_data[i];
}
Thanks rajrdajr for the tip!
Useful Links:


 Pebble SDK has had a feature allowing to combine 2 images with transparency for a while via different