Pebble smartwatch SDK offers a very extensive graphics library. And if that is not enough – you can access graphics memory directly for pixel-precision manipulation. For example this code
GBitmap *fb = graphics_capture_frame_buffer_format(ctx, GBitmapFormat8Bit);
uint8_t *fb_data = gbitmap_get_data(fb);
captures Pebble screen as a bitmap and consequently as raw uint8_t data you can manipulate. But the problem with this approach – you access the data as 1-dimensional array, which is very inconvinient when you’re dealing with 2-dimensional screen.
Fortunately due to magic of casting this problem can be addressed. Consider following addition to previous code:
#define WINDOW_WIDTH 144
uint8_t (*fb_matrix)[WINDOW_WIDTH] = (uint8_t (*)[WINDOW_WIDTH]) fb_data;
Using this, you can access screen data via familiar coordinates. For example if you need to set pixel at coordinates Y=120, X=60 to black color, all you have to do is
fb_matrix[120][60] = 0;
And now we can rewrite InverterLayer from previous post to a simpler form. First in layer callback we create bitmap matrix and call effect function:
static void effect_layer_update_proc(Layer *me, GContext* ctx) {
  // getting layer coordinates
  GRect layer_frame = layer_get_frame(me);

  //capturing framebuffer bitmap into 2-d matix
  GBitmap *fb = graphics_capture_frame_buffer_format(ctx, GBitmapFormat8Bit);
  uint8_t (*fb_matrix)[WINDOW_WIDTH] = (uint8_t (*)[WINDOW_WIDTH]) gbitmap_get_data(fb);

  //callig effect function
  effect_invert(fb_matrix, layer_frame);

  //releasing framebuffer
  graphics_release_frame_buffer(ctx, fb);

}
And actual inverting function becomes much simpler as well, simple loop thru layer pixel, inverting colors:
// position: x,y,h,w of the layer
void effect_invert(uint8_t (*fb_a)[WINDOW_WIDTH], GRect position) {

  for (int y = 0; y < position.size.h; y++)
     for (int x = 0; x < position.size.w; x++)
        fb_a[y + position.origin.y][x + position.origin.x] = ~fb_a[y + position.origin.y][x + position.origin.x];

}
You can see this approach in EffectLayer library.
 In my previous post I described how you can access framebuffer of Pebble screen via familiar X,Y coordinates. To reiterate: you capture framebuffer as a bitmap, and access bitmap as 2-dimentional matrix:


 Pebble SDK has had a feature allowing to combine 2 images with transparency for a while via different
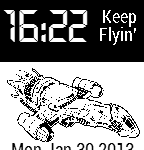
 There’s no doubt that Firefly is a greatest TV series in the history of all creation. That is why when I was learning resource handling in Pebble SDK I have decided to create a watchface that would display a random quote from Firefly. And thanks to Bill Hatcher of